November 28, 2013

All things mirrored: The Discovery of One King's Lane

Lately I've been dreaming of all things mirrored, as I say "I wish I had a credit card that never had to be repaid"...

Like these end tables from Pier 1.

Hayworth Night Stand, $249

Hayworth Chest, Silver $599

A friend of mine recently hosted a housewarming party at her new place, where everything was decorated impeccably. I kept seeing cute thing after quaint accent after great decorating idea. 
When I asked about these awesome little details, she told me about a site called One King's Lane.


 WARNING: stay far away if you're on a budget!  This website is like decorating madness! 

Needless to say, I'm addicted. These items range in price from about $10 up to things for several thousand dollars (WAY out of my price range!)

And the categories and specials change daily.  What a gem for a Bargain shopper!

Still dreaming of mirrors....
Loren Mirrored Chest $899
Sully Side Table $129


But since those were all a bit out of my price range, I got this great mirrored tray!

For only $19!

That I think may become my coffee table centerpiece once it arrives.   So far, I've been very happy with it!  Happy Shopping!
Follow Me on Pinterest

November 19, 2013

DIY Tufted Vanity Seat

For years, I have been moving around an old piano bench I bought years ago- a $10 thrift store find. 

Once we were all moved in, it no longer had a functional home as a table (its previous purpose) so I decided to turn it into a vanity 'seat' if you will, for my bathroom. Lots of extra space in there!

Step 1: tighten all the screws :) 
Step 2: clean & paint with Krylon Rust-oleum 'Antique Bronze' paint. 


Sorry there's no before photo, but it was all originally the light wood color of the seat.  You can imagine. Notice the lovely rings from a lack of coaster utilization. 
I had no need to paint the whole piece, since I just planned to cover it again anyway. (And I ran out of paint...it must have been meant to be since I had the perfect amount of paint!)

Step 3: Paint a clear top coat over the Bronze color. 


Step 4: After this, I drilled the holes which I would later thread buttons through to make the tufts. 

My Motto before cutting or drilling into anything is: Measure, Measure again, and Remeasure!

Step 5: I used a generic spray adhesive to attach the 1.5" foam padding for the seat. (This I had leftover from the headboard project).

No need to cut these perfectly straight either, since you will pull the fabric taut around it again. I actually pieced mine together, and it worked great. Notice the seam.


Step 6: Just as in the headboard tutorial, I layered the batting over the foam before covering it with fabric. 

Step 7: Beginning with the corners, I pulled the fabric taut, and folded the corners smoothly down before stapling with a staple gun into the underside of the bench. 

I did detach the actual seat from the frame for the added maneuverability of the upholstery step. 


Step 7.5: Alternating sides, I pulled the fabric taut and stapled, until it was smooth to my liking. 

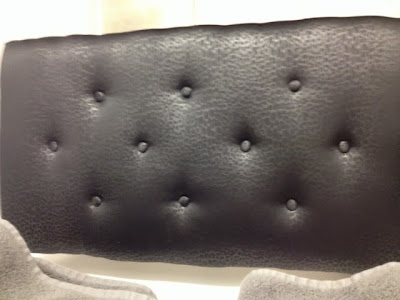
Step 8: Then came the tufting step, which again, I did exactly the same as in my headboard project. (Check it out).


And this is my finished product! 


I'm very pleased with the way this turned out. The bench can live as a bench again and makes my master bath a little bit more luxurious! 

Follow Me on Pinterest

November 1, 2013

Fancy Fingers

We're going to a black tie event this weekend, and with all the necessary purchases (dress, shoes, etc) I decided id save a little money on the hair and nails and do them myself.

I'm testing out the ring finger thing- What do you think? 

I thought the pewtery glitter would be great with my new shoes: 

http://www.dsw.com/shoe/audrey+brooke+hawkins+bootie?prodId=287273&productRef=SEARCH
Audrey Brooke Hawkins Bootie in Pewter from DSW.com.

For the nails, I did a basic nude polish from OPI called "Don't Pretzel My Buttons"  and for the ring finger I used actual pewter glitter from Hobby Lobby I had originally purchased for another craft project that I sprinkled over a wet top coat.  And then coated with a finishing top coat.

(The hardest part for me about doing my nails is sitting still and. Not touching anything when they're wet!) 

Hair photos to come after the event! 

And my apologies for the poor photo quality! This post was en route to the event location via train.  
Follow Me on Pinterest